


Hitler targets the UK
A Clash in the Skies That Changed the Course of History
Between July and October 1940, the skies above Britain became a furious theatre of war—a crucible where the fate of a nation, and perhaps the free world, hung in the balance.
The Battle of Britain was not merely a military engagement; it was a showdown of unprecedented scale and significance, the first major campaign to be fought entirely by air forces.
Overhead, the Royal Air Force and the German Luftwaffe clashed in a relentless struggle, their dogfights painting the heavens with trails of smoke and fire.
This was no ordinary battle. It was a desperate, defiant stand against annihilation—a fight not only for Britain’s survival but for the very soul of Europe.
Nazi Germany, emboldened by its swift conquest of the continent, now sought to crush the last bastion of resistance.
Operation Sea Lion, Hitler’s plan to invade the British Isles, loomed menacingly on the horizon.
But before a single German boot could touch British soil, the Luftwaffe would have to dominate the skies—and there, they met fierce resistance.

Kent, England, 3 September, 1940 "Battle of Britain". Hop pickers' children from the East End of London are hiding in a slit trench at the edge of a field (possibly Beltring Hop Farm) whilst watching a dog fight overhead during the Battle of Britain.
Photo by John Topham (for 'Life' magazine), this was his most famous image. It was used in a propaganda campaign alongside the slogan "Help England And It Won't Happen Here" which helped to convince millions of Americans to join the war against Nazi Germany.

RAF Pilots scramble for their Hurricanes during the Battle of Britain. The Hawker Hurricane played a crucial role in the Battle of Britain, serving as the backbone of RAF Fighter Command. While the Spitfire gained more fame, the Hurricane was responsible for downing the majority of enemy aircraft during the battle. Its sturdiness and ability to absorb damage made it ideal for combating the heavily armed German bombers. The Hurricane's reliability and effectiveness in dogfights and bomber interceptions were key factors in Britain's success against the Luftwaffe.
...often outnumbered, always undaunted...

Winston Churchill’s immortal words ring through time: "Never in the field of human conflict was so much owed by so many to so few."
His tribute to the RAF’s pilots—young men who soared into battle, often outnumbered, always undaunted—captures the spirit of a nation that refused to yield.
These were the defenders of hope, their courage matched only by their skill, their sacrifice lighting a fire of defiance across the land.
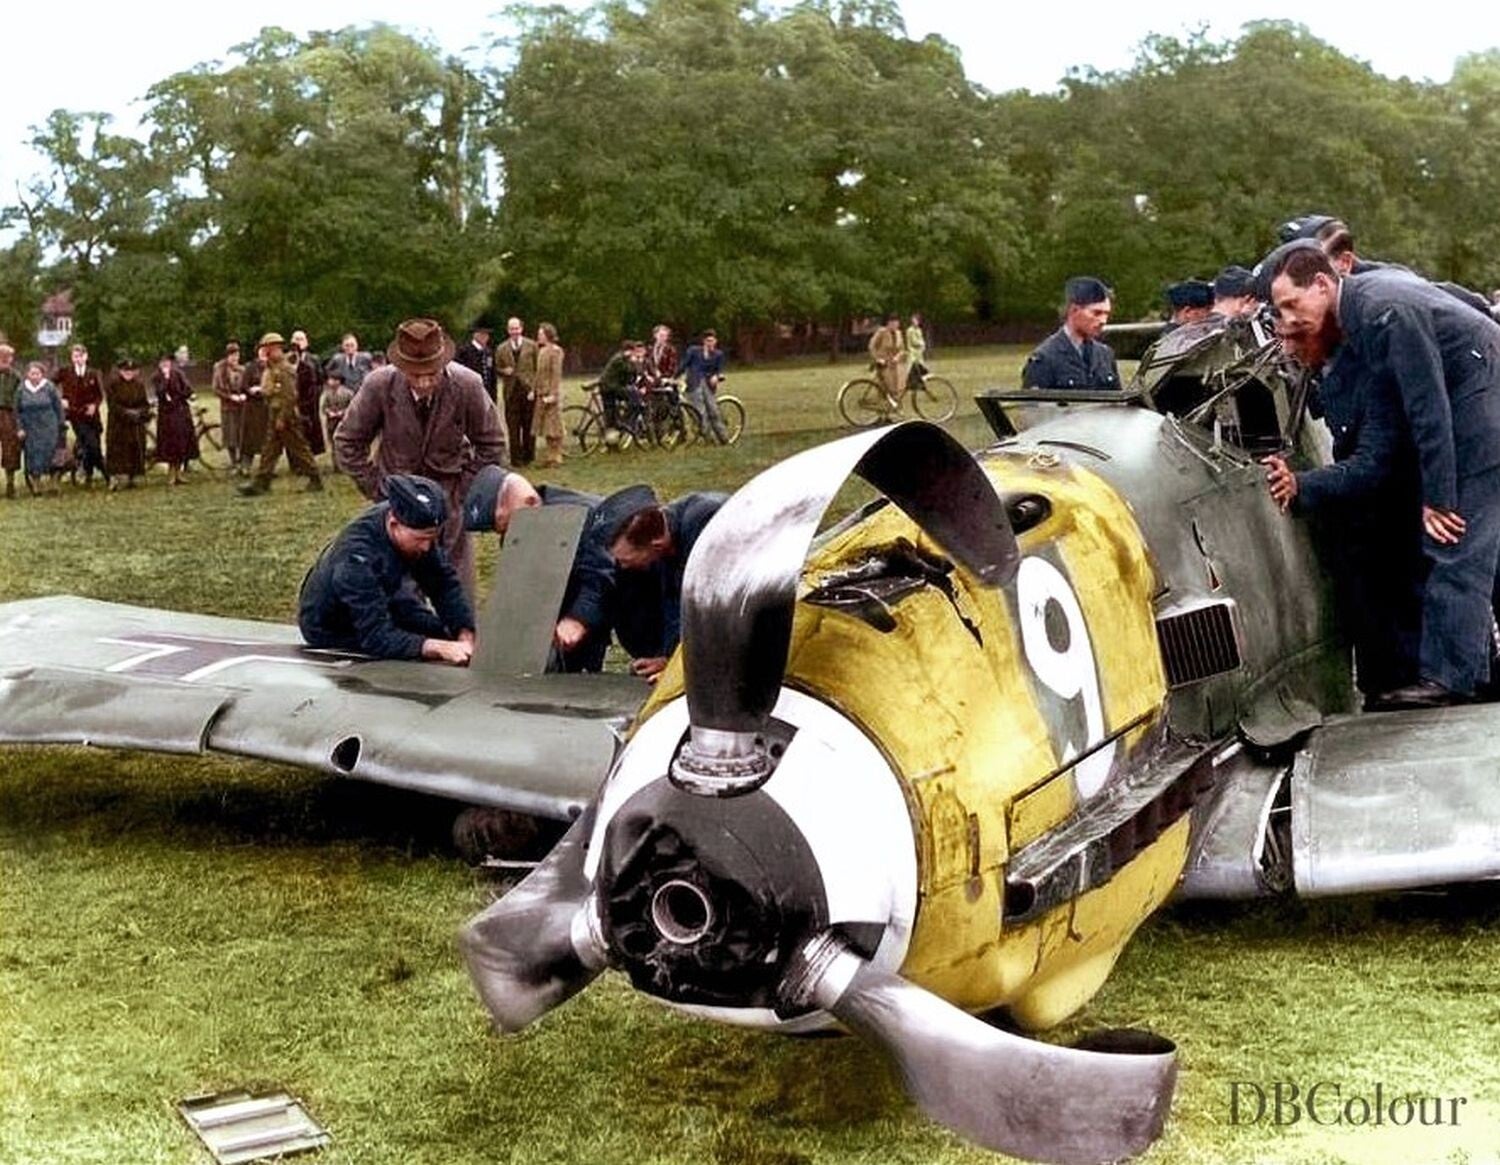
On the evening of the 30th September, 1940, Oberleutnant Karl Fischer’s Bf 109E-1 of 7./Jagdgeschwader 27 was forced to make an emergency landing near Queen Anne’s Gate in Windsor Great Park, Berkshire. His mission had been to escort bombers, but en route to the target, the formation came under attack—likely from the skilled Polish pilots of No. 303 Squadron’s Hurricanes. Engaged in a fierce dogfight, Fischer initially believed his aircraft had escaped unscathed. However, a radio transmission from his wingman warned him of a white plume of fuel trailing behind. Checking his gauges, he saw his fuel tanks were nearly empty. With no hope of returning to base, he attempted a forced landing, but his aircraft overturned on touchdown, riddled with bullet holes from the rear. Fischer survived and was swiftly taken prisoner, his war in the skies over Britain now over. Meanwhile, his downed aircraft became an object of fascination for local civilians. Crowds gathered to inspect the once-feared German fighter up close, running their hands along its battered fuselage and staring at the black-cross insignia that once ruled the skies over Europe. Seeing a Luftwaffe plane brought down in British soil was more than just a curiosity—it was a morale boost. It was proof that the RAF was holding its own, that the enemy could be beaten, and that Britain’s defenders would not falter.
...galvanized the Allied cause...
The outcome of the battle shattered Hitler’s ambitions. Operation Sea Lion was shelved, and Britain stood firm—bruised but unbroken. More than a military victory, the Battle of Britain was a turning point in the Second World War.
It proved that Nazi aggression could be resisted, that tyranny was not invincible. It galvanized the Allied cause and inspired millions across the globe.
To this day, the Battle of Britain endures as a symbol of resilience, unity, and unwavering determination.
It was a moment when the fate of nations was decided not on land or sea—but high above, in the roaring silence of the clouds.


A modified Spitfire at the 2024 Battle of Britain Airshow at Headcorn, Kent in the UK. Airshows play a vital role in keeping the history of the Battle of Britain alive, offering powerful, immersive tributes to the bravery of “The Few.” Through aerial displays of Spitfires and Hurricanes, reenactments, and educational exhibits, they connect modern audiences to 1940’s skies. These events honour the legacy of RAF heroes, inspire younger generations, and preserve historical aircraft. More than entertainment, airshows serve as living memorials, ensuring the courage and sacrifice of the Battle of Britain are never forgotten.

Storm Before the Tempest: The Road to the Battle of Britain
The origins of the Battle of Britain were forged in the chaos and fury of a world teetering on the brink. In the wake of the First World War, the Treaty of Versailles left Germany crippled—its economy shattered, its pride wounded, its people seething with resentment.
Out of this smoldering ruin rose a force that would plunge the world into darkness: Adolf Hitler and his Nazi regime.
By 1933, the swastika flew high above Germany. Under Hitler’s iron-fisted rule, the nation cast off the shackles of Versailles and began to rearm at a frightening pace.
The Luftwaffe—once forbidden—emerged from the ashes as a fearsome symbol of Nazi ambition.
By the eve of war, Germany was no longer broken; it was bristling with power and thirsting for conquest.
September 1939: the storm broke. Germany's blitzkrieg crushed Poland with terrifying speed, and in response, Britain and France declared war.
But for months, Europe held its breath in a surreal calm—the so-called "Phoney War."
That illusion shattered in May 1940 when Hitler unleashed hell across Belgium, the Netherlands, and France. Lightning-fast, merciless, unstoppable—his armies swept aside resistance and brought Western Europe to its knees.
France fell. The British stood alone.

The image of Polish soldiers captured by German forces during the 1939 invasion of Poland marks a defining moment in modern history. Germany’s brutal and swift assault, in collaboration with the Soviet Union, led to the fall of Poland and triggered Britain and France to declare war on Germany, officially beginning the Second World War. In the months that followed, Nazi Germany launched a series of lightning-fast invasions across Western Europe, toppling nations with alarming speed. By the summer of 1940, Britain stood alone against the advancing Axis powers, setting the stage for the pivotal Battle of Britain that would soon unfold.
Hugo Jaeger—The LIFE Picture Collection/Shutterstock

Adolf Hitler with Heinrich Himmler (left) and Felix Steiner (right) planning their war moves, 1938. The rise of the Nazis in the 1930s, driven by aggressive expansionism and militarization under Adolf Hitler, inevitably led to Britain facing Germany in war. Hitler's annexations and invasions threatened European stability, compelling Britain to defend against growing German aggression.
...beneath the triumph lay a sobering truth...

In a desperate act of heroism and improvisation, Britain launched Operation Dynamo, a frantic naval evacuation of over 300,000 Allied troops trapped on the beaches of Dunkirk.
Small civilian boats joined warships in a courageous effort that became known as the "Miracle of Dunkirk."
Yet beneath the triumph lay a sobering truth—Britain was now isolated, vulnerable, and facing invasion alone.
With Western Europe under his boot, Hitler cast his gaze across the Channel. Britain was next.

Abandoned British Army vehicles litter the beach at Dunkirk after the British Expeditionary Force (BEF) and thousands of Allied soldiers were evacuated from France during Operation Dynamo. The evacuation significantly impacted the Battle of Britain by preserving Britain's core fighting troops. This allowed the UK to maintain its defensive capabilities and prepare for the Luftwaffe's imminent assault.
Rarely Seen Color Photographs of the Aftermath of the Battle of Dunkirk in 1940 ~ Vintage Everyday
...the Luftwaffe had to rule the skies...
At first, he offered peace—terms delivered with the smug confidence of a conqueror. But Britain, under the defiant leadership of Winston Churchill, refused to bow.
So Hitler ordered the unthinkable: an invasion of the British Isles. Operation Sea Lion was born. But before German boots could land on English soil, the Luftwaffe had to rule the skies.
Air superiority was essential.
The English Channel would become a gauntlet, and southern England, a battlefield in the clouds.
Thus, the stage was set for one of history’s most titanic aerial clashes: the Battle of Britain.


A 4 inch gun of 177 Heavy Battery, Royal Artillery, being fired at Fort Crosby near Liverpool, England, 1st August 1940. This training operation formed part of British preparations to repel the threatened German invasion - 'Operation Sealion' - of 1940. Operation Sea Lion was Hitler’s plan to invade Britain, but its success depended on German control of the skies. Anticipating invasion, Britain fortified its coastline with barbed wire, pillboxes, and beach defences, while preparing the Home Guard and regular forces for a last stand. The Royal Navy remained a formidable obstacle, ready to intercept German transports. Crucially, the RAF’s resistance in the skies prevented German air superiority, forcing Hitler to indefinitely postpone the operation.
https://www.militaryimages.net/media/operation-sea-lion.29955/
...young, untested, but resolute...

As German preparations gathered momentum, Britain, too, braced for war. The Royal Air Force—its pilots young, untested, but resolute—was bolstered and readied.
Radar stations rose like sentinels along the coast. Blackout curtains were drawn, sandbags piled high, and the hearts of a nation steeled for the onslaught to come.
This would not be a mere battle of bombs and bullets—it would be a crucible of courage.
The skies of Britain were about to ignite, and with them, the fate of a free world would be decided.

A German map from 1940-41 of plans for Operation Sealion - the invasion of Britain. In addition to German forces and planned invasion routes, the planner also drew cartoon ships steaming across the English Channel and a stick figure paratrooper over Kent. Operation Sea Lion, Hitler's planned invasion of Britain, was directly linked to the Battle of Britain. A Luftwaffe failure to achieve air superiority during the battle would force the postponement and eventual cancellation of the invasion plans.

Adolf Hitler’s last appeal to reason was made in his speech on 19 July 1940, In it, he expressed a final attempt to sway Britain to negotiate peace, offering generous terms. This was largely ignored, and the push for total war continued. It marked the end of any potential diplomatic settlement with Britain before the Battle of Britain escalated.

The Gathering Storm: The Strategic Stakes of the Battle of Britain
The Battle of Britain held the weight of the world in its wings. It was not merely a confrontation of air forces—it was a reckoning that would shape the fate of nations.
For Nazi Germany, it was the next logical strike in a campaign of relentless conquest.
With France crushed beneath its boots, Hitler’s war machine stood unopposed on the continent. Only Britain remained—a solitary beacon of resistance.


German occupied Europe in 1940. The Nazi war machine had much of Europe under its control with only the United Kingdom and the Soviet Union still opposing it. If Hitler was to bring Britain to its knees by invasion, he would first need to subdue its air defences. (Although the matter of Britain's large and powerful navy remained another matter).
...vulnerable to invasion, subjugation, and collapse...

But to invade the island fortress, Germany first needed to seize control of the skies.
Operation Sea Lion, the planned amphibious invasion, depended entirely on Luftwaffe dominance.
Had the Germans succeeded in sweeping the RAF from the air, Britain would have stood exposed—vulnerable to invasion, subjugation, and collapse.
A German victory here would have tilted the balance irreversibly, casting Europe into shadow and ensuring Nazi supremacy.


The Battle of Britain was vital to Operation Sea Lion (Unternehmen Seelöwe.), the invasion of Britain, as German invasion plans depended on achieving air superiority over Britain. The Luftwaffe aimed to destroy the RAF, clear the skies for safe passage across the Channel, and protect German forces from naval and aerial attacks during the planned amphibious assault. In preparing for Sea Lion, a vast amount of information, including maps and photographs, was assembled by the German military. The maps in this collection were arranged in groups, based on the Ordnance Survey Quarter-inch Fourth Edition sheet lines, and distributed in pale green A4 size folders, which also included a book of postcard-sized photographs. The one above shows Avonmouth in Somerset, Southwest England.
https://david-archer-maps.co.uk/military-maps/operation-sea-lion/folders/
...flung open the gates to catastrophe...
For Britain, the battle was nothing short of a fight for survival.
Losing air superiority would have flung open the gates to catastrophe.
The English Channel, once a natural barrier, would have become a highway for German troops.
With the United States still watching from afar, Britain faced the storm alone.
The RAF was all that stood between the nation and invasion—between freedom and the boot of tyranny.


Map of RAF Fighter Command Groups and Sectors during the Battle of Britain. In 1940, RAF Fighter Command was divided into six groups, each covering a specific region of the UK. Group 11, in southeast England, bore the brunt of the fighting. Coordinated through a centralised system using radar and ground observers, this organisation enabled swift, effective responses that were vital to Britain's defence.
On the eve of the Battle of Britain, the RAF stood as the final barrier between Hitler and a successful invasion of the UK. With France fallen and Europe under Nazi control, Britain faced the full force of the Luftwaffe. Hitler knew air superiority was essential for Operation Sea Lion to proceed. Though outnumbered, the RAF's fighter pilots, radar network, and indomitable spirit formed a thin but unbreakable shield guarding the nation from impending invasion and occupation.
...a launchpad for future Allied offensives...

In England, American soldiers, having loaded their equipment and supplies onto an LCT (Landing Craft, Tank) await the signal to begin the D-Day invasion, June 1944. Victory in the Battle of Britain ensured the UK remained secure, providing a critical base for launching the D-Day invasion. Retaining this stronghold enabled the Allies to plan, gather forces, and stage the successful Normandy landings.
26 Rare Color Photos of D-Day Show a New View of Historic World War II Invasion ~ Vintage Everyday
But the importance of this battle reached far beyond immediate military concerns.
Britain’s survival preserved a launchpad for future Allied offensives.
Without it, there would have been no D-Day, no liberation of France, no foothold from which to strike back against Hitler’s empire.
The skies over southern England became the first front in what would become a long and grueling counter-offensive to reclaim Europe.
Beyond strategy, the Battle of Britain ignited a fire in the hearts of the people.
While bombs fell and cities burned, the nation did not break. Victory in the air offered more than safety—it gave the world hope.
It became a symbol of unyielding defiance in the face of overwhelming odds.
As the RAF pushed back the Luftwaffe, they did more than defend airspace—they defended the idea that freedom was worth fighting for.
The battle also resonated across oceans.
Neutral nations watched closely. British resistance proved that Hitler could be challenged, and that his advance was not unstoppable.

The British newspaper The Daily Sketch reporting on the Battle of Britain, 19th June 1940. The Daily Sketch and other British newspapers played a vital role in shaping global perception of the Battle of Britain. Through dramatic headlines, stirring photographs, and heroic portrayals of RAF pilots, they captured the defiant spirit of a nation under siege. These reports resonated worldwide, inspiring sympathy and support, particularly from the United States. By highlighting British resilience and framing the battle as a fight for freedom, the press helped shift international opinion against Nazi aggression.
https://ibccdigitalarchive.lincoln.ac.uk/omeka/collections/document/22389
...proved that Hitler could be challenged...

This resilience played a vital role in influencing the United States to expand its support, culminating in the Lend-Lease Act—an act of lifeline aid that kept Britain in the fight when it needed it most.
The strategic significance of the Battle of Britain could not be overstated.
It was not just a battle for territory or tactical advantage—it was a moment that determined the course of the Second World War. Britain stood its ground, and in doing so, held the line for the free world.

Lend Lease M3 loaded on ship at Atlantic Port 1942. The Battle of Britain demonstrated the UK's resilience against Nazi Germany, influencing the United States to support the Lend-Lease scheme. This aid provided crucial military supplies and resources, bolstering Britain's defense and strengthening the Allied position in the war.
Lend Lease M3 loaded on ship at Atlantic Port 1942 | World War Photos

Architects of Victory and Defeat: The Commanders of the Battle of Britain
As the skies above Britain darkened with the threat of invasion, the fate of a nation—and perhaps the world—rested not only on the wings of fighter planes, but in the minds of a handful of men.
The Battle of Britain would become a test of nerve, vision, and leadership.
And at its heart were the commanders—those whose decisions would tip the scales between survival and subjugation.


Bomb damage during the Battle of Britain in Dover. RAF No. 11 Group played a strategically vital role during the Battle of Britain, defending the most vulnerable and heavily targeted region of the country—southeast England. This area included key coastal towns like Dover and the approaches to London, making it the primary focus of the Luftwaffe’s assault. Under the command of Air Vice-Marshal Keith Park, 11 Group used an advanced system of radar, ground observers, and well-positioned airfields to rapidly deploy fighter squadrons. Their quick, coordinated responses were crucial in intercepting enemy raids and preventing German air superiority, ultimately safeguarding Britain from invasion.
https://www.kentonline.co.uk/kent/news/the-bombs-which-changed-the-county-280416/
...the unbreakable voice of defiance...

On the British side, Winston Churchill, newly risen to the premiership in Britain’s darkest hour, became the unbreakable voice of defiance.
His words, carved into history with fire and steel, stirred the soul of a battered nation.
“We shall fight on the beaches... we shall never surrender.”
With those thunderous lines, Churchill gave Britain more than resolve—he gave it a reason to believe it could endure.

Churchill giving his famous V for Victory salute during a visit to Bradford. Churchill's V sign, symbolizing "Victory," became an emblem of Britain's defiance during the Battle of Britain. It rallied public morale, signifying resilience and determination to overcome Nazi aggression, embodying the nation's spirit and resolve in the face of adversity.
Imperial War Museum https://www.cam.ac.uk/stories/churchill-at-war
...a man of foresight and iron discipline...
But inspiration alone could not win a war. In the war rooms and radar bunkers, Air Chief Marshal Hugh Dowding—the austere and brilliant commander of RAF Fighter Command—crafted the defenses that would hold back the tide.
Dowding was a man of foresight and iron discipline, whose belief in technology and efficiency birthed an integrated air defense system unlike any the world had seen.
He refused to waste lives in needless heroics; he played the long game, and in doing so, gave Britain the edge it so desperately needed.


Air Chief Marshal Hugh Dowding. His serious and sombre exterior hid a keen, tactical mind and one which had the fortitude to persevere with his defensive strategy, even when the RAF faced its darkest days in 1940. He carefully guarded his limited fighter force, rotating tired or worn-down squadrons, ensuring there was a constant supply of replacement aircraft and maintaining a steady
Paul Crickmore/BNPS/Richard Molloy

Air Vice-Marshal Keith Park. He played a pivotal role during the Battle of Britain, commanding No. 11 Group in defending southeast England. Calm, decisive, and deeply respected by his pilots, Park expertly managed limited resources, deploying squadrons with precision. His tactical brilliance helped repel the Luftwaffe and secure Britain’s skies.
...bore the weight of the Luftwaffe’s full fury...

On the front lines of the aerial war, Air Vice-Marshal Keith Park of No. 11 Group bore the weight of the Luftwaffe’s full fury.
It was Park’s skies that would burn. His pilots who would rise—again and again—to meet the incoming storm.
Calm and calculating, Park understood the rhythm of battle.
He deployed his forces with deadly precision, refusing to be lured into traps, striking only when the moment was right. In his hands, the southeast of England became a fortress in the clouds.


Map of the sectors and fighter stations in 11 Group, RAF Fighter Command in 1940. Air Vice-Marshal Keith Park led No. 11 Group with exceptional skill during the Battle of Britain, directing the defence of southeast England—where the fiercest fighting occurred. Operating under immense pressure, he used a flexible, measured approach, scrambling only as many squadrons as needed to meet each threat. Park’s leadership, calm under fire, and mastery of the Dowding System were crucial in preserving fighter strength. His decisions helped ensure the RAF’s survival and ultimately thwarted Hitler’s invasion plans.
https://www.facebook.com/photo/?fbid=961696029333541&set=a.469699018533247
...crucial but often overlooked roles...
During the Battle of Britain, the commanders of No. 10, 12, and 13 Groups also played crucial but often overlooked roles in supporting the frontline defence led by No. 11 Group.
Air Vice-Marshal Sir Quintin Brand, leading 10 Group, was responsible for defending southwest England and South Wales.
His group regularly supported 11 Group during peak Luftwaffe attacks, helping to relieve pressure on the southeast.
Air Vice-Marshal Trafford Leigh-Mallory of 12 Group, covering the Midlands and East Anglia, became a controversial figure by promoting the “Big Wing” tactic—large formations of fighters to engage enemy raids.


Air Vice-Marshal Sir Quintin Brand, Commander RAF Fighter Command, No. 10 Group.

Air Vice-Marshal Trafford Leigh-Mallory, Commander RAF Fighter Command, No. 12 Group.

Air Vice-Marshal Richard Saul. Commander RAF Fighter Command, No. 13 Group.
...vital coverage and reserve support...

While its effectiveness remains debated, it showed the complexity of coordinating air defence across regions.
In the north, Air Vice-Marshal Richard Saul of 13 Group ensured the defence of key industrial areas in northern England and Scotland.
Though less directly engaged, his group provided vital coverage and reserve support, allowing Fighter Command to remain flexible and resilient.

In 1940, Scapa Flow was a vital Royal Navy anchorage in the Orkney Islands, essential to Britain’s naval dominance and protection of Atlantic shipping routes. Its strategic location made it a potential target for German reconnaissance and bombing raids. RAF 13 Group, responsible for defending northern England and Scotland, played a key role in protecting this crucial base. Although 13 Group saw less direct combat than others during the Battle of Britain, it provided vital early warning, reconnaissance, and air defence. Their efforts ensured Scapa Flow remained secure, allowing the Royal Navy to operate freely during a critical phase of the war.
...flamboyant, ruthless, and overconfident...
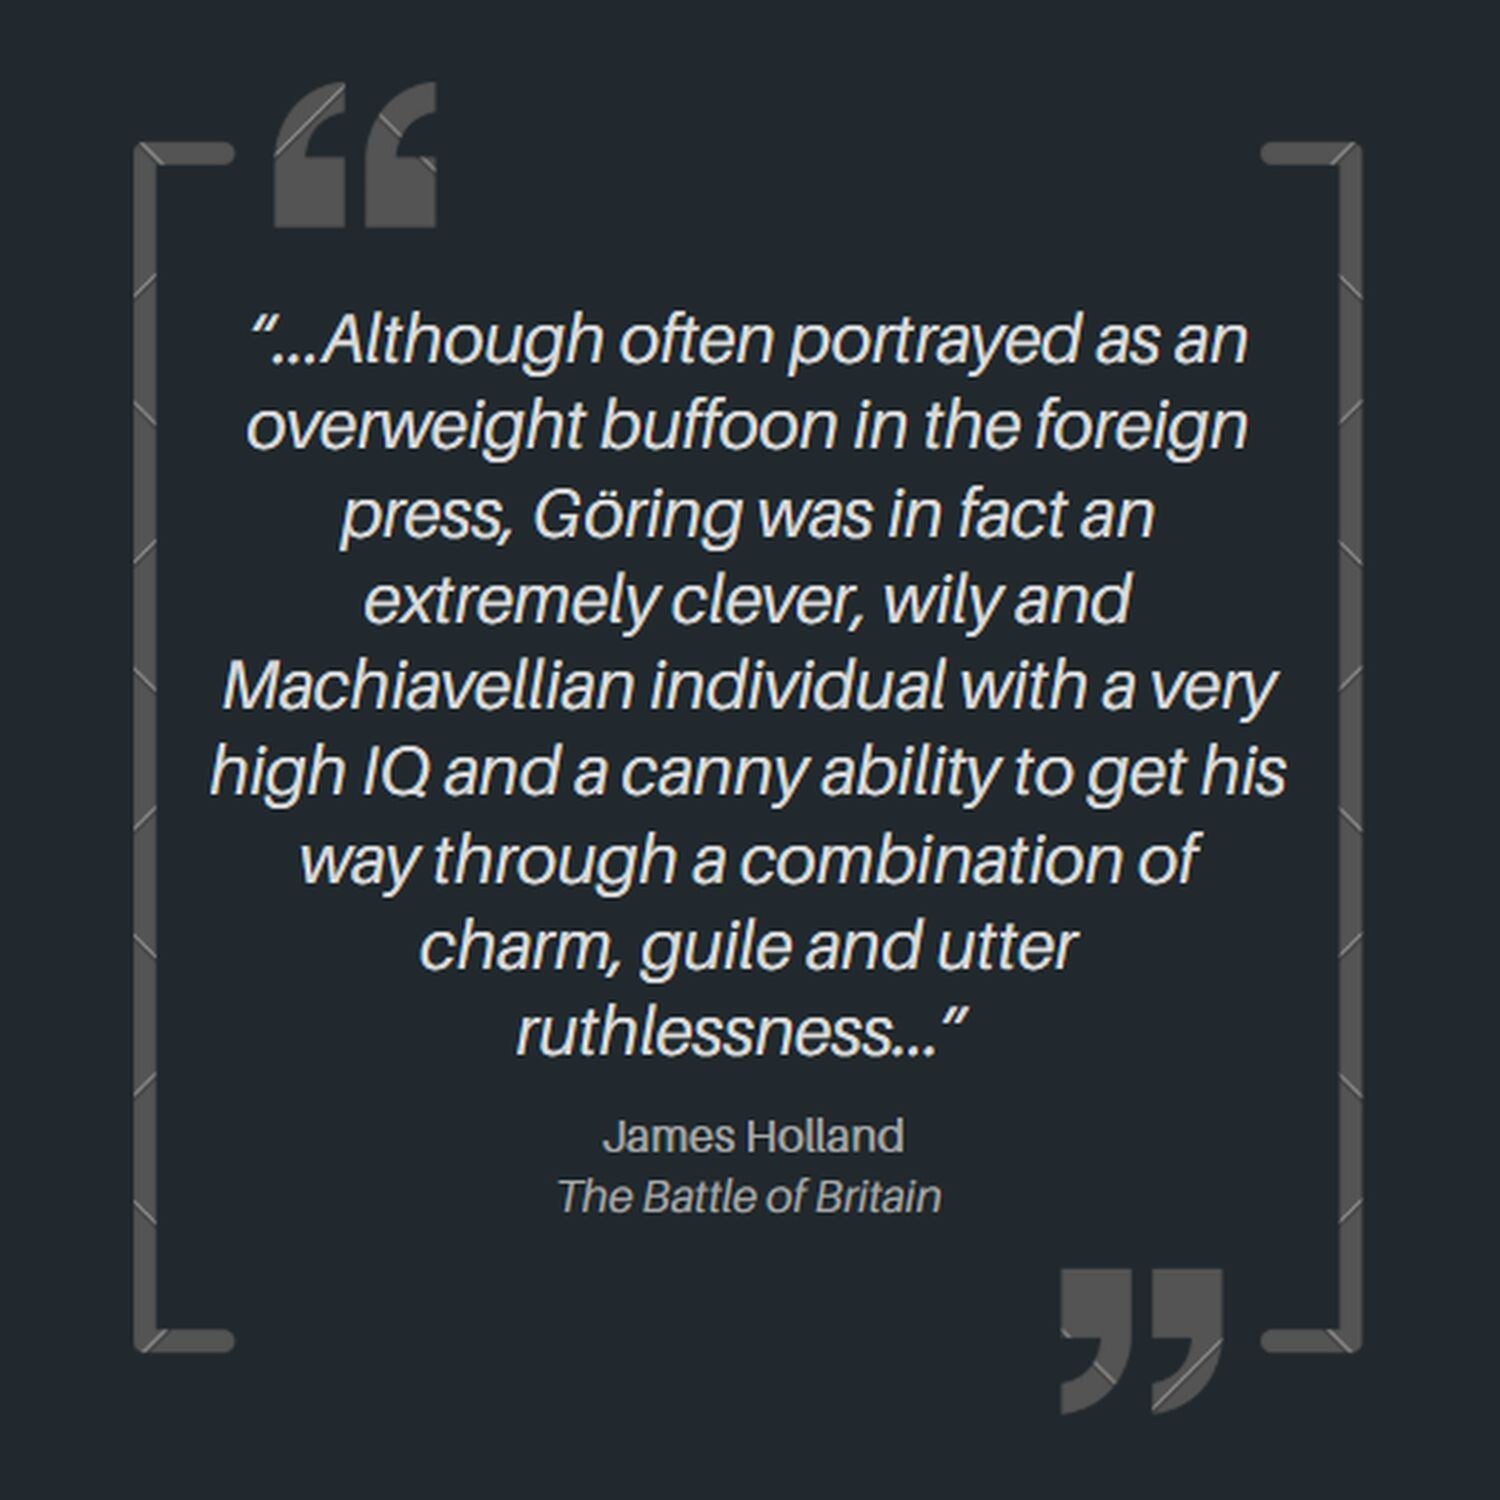
Meanwhile, across the English Channel, Hermann Göring, flamboyant, ruthless, and overconfident, commanded the Luftwaffe with bombast and arrogance.
A former fighter ace turned political heavyweight, Göring promised Hitler swift victory through airpower alone.
But in his hubris lay his downfall.
He underestimated British resolve, misunderstood the value of radar, and shifted tactics at crucial moments, squandering the Luftwaffe’s early advantages.
Below him, his top lieutenants—Generalfeldmarschall Albert Kesselring and Generalfeldmarschall Hugo Sperrle—divided the skies between them.
Kesselring’s Luftflotte 2 bore down on southeast England, while Sperrle’s Luftflotte 3 pounded targets in the west.
Their air fleets unleashed devastation—but without cohesive coordination or clear strategic vision, the full might of the German air force failed to break British resistance.

Hermann Göring, the commander-in-chief of the Luftwaffe. Once a celebrated fighter ace, he entered the conflict overconfident, promising swift victory. However, his strategic missteps, underestimation of British defenses, and frequent tactical shifts contributed significantly to the Luftwaffe’s failure to gain air superiority.


Generalfeldmarschall Albert Kesselring, commander of Luftflotte 2. A skilled and energetic strategist, he coordinated relentless bombing raids. However, despite his experience, Kesselring was constrained by shifting orders and strategic miscalculations that ultimately contributed to the Luftwaffe’s failure to gain air superiority.
https://ww2colorfarbe.blogspot.com/2016/04/generalfeldmarschall-albert-kesselring.html

Generalfeldmarschall Hugo Sperrle, commander of Luftflotte 3. A veteran of air warfare, Sperrle oversaw heavy bombing campaigns in western and central England, but his efforts were undermined by poor coordination with other Luftwaffe units and flawed strategic decisions from the German high command.
Hugo Sperrle, Generalfeldmarschall of the Luftwaffe, 1940 - Rare Historical Photos
...to bend but not break...
The contrast between the two sides was stark. The British system, decentralized and nimble, empowered its commanders to act decisively, to adapt in the heat of battle.

The German structure, rigid and top-heavy, relied on orders from above—orders that often came too late, or with too little understanding of the battlefield below.
In the end, it was not just bravery or machines that decided the outcome of the Battle of Britain—it was leadership.
It was vision. It was the ability to endure pressure, to bend but not break. The minds behind the battle shaped its course as surely as the pilots who flew it.
And in that crucible of command, Britain found not just survival, but the seeds of eventual victory.

Hermann Göring in France in 1941. Göring was commander in chief of the Luftwaffe during the Battle of Britain. His overconfidence and strategic miscalculations would prove costly. The German command structure was rigid, with decisions delayed by bureaucracy and a lack of situational awareness. Göring underestimated the RAF and shifted targets too often—from airfields to cities—diluting the effectiveness of German attacks. His inability to adapt to the RAF’s radar-backed defence and coordinated fighter control would allow Britain time to recover and regroup. Ultimately, Göring’s leadership exposed the weaknesses of the Luftwaffe’s planning and contributed to Germany’s first major defeat of the war.

The Eagle Strikes: The Luftwaffe’s Approach to the Battle of Britain
When France fell in just six weeks under the relentless force of Blitzkrieg, it sent shockwaves across Europe.
The German war machine appeared unstoppable, and Hitler's confidence soared. With Western Europe under Nazi control, only Britain remained defiant.
Now isolated, the British Isles became Hitler’s next target. He set his sights on Operation Sea Lion—the planned invasion of Britain.
But for the invasion to succeed, Germany first had to control the skies. Air superiority was essential.
That responsibility fell to the Luftwaffe, Germany’s formidable air force, which had enjoyed dominance—until now. The stage was set for a new kind of battle.

Hitler in Paris after the the Fall of France, the Eiffel Tower can be seen in the background. After France’s defeat in 1940, Hitler expected Britain to negotiate peace. When it didn’t, he ordered preparations for Operation Sea Lion, a planned invasion. However, success hinged on gaining air superiority.

A German Me 110 on a mission above the white cliffs of the English Channel coast in 1940. The 110 was originally envisioned as a long-range escort fighter, designed to protect German bombers during deep penetration raids over Britain. With its twin engines, heavy armament, and range, it was expected to dominate RAF fighters in the air. However, during the Battle of Britain, the Bf 110 proved vulnerable to the more agile Spitfires and Hurricanes. Its perceived role as a bomber escort quickly diminished, revealing a major flaw in German aerial planning.
24 Disturbing Pictures From The Battle Of Britain
Ullstein Bild / Getty Images
...enjoyed swift, crushing victories...

Organizational Command Structure of Luftwaffe during the Period of 1933 to 1945.
https://en.wikipedia.org/wiki/Organization_of_the_Luftwaffe_(1933%E2%80%931945)
At first glance, Germany appeared unstoppable in the air.
The Luftwaffe had enjoyed swift, crushing victories in Poland, Norway, the Low Countries, and France.
Its doctrine emphasized speed, aggression, and combined-arms warfare.
Under the overall command of Reichsmarschall Hermann Göring, the air force had become a symbol of Nazi military might.
Confident and emboldened, Göring promised Hitler that Britain could be brought to its knees through air power alone.


The Dornier Do 17, nicknamed the "Flying Pencil" for its slender fuselage, was a key component of the Luftwaffe’s strategy during the Battle of Britain. Designed as a fast, light bomber, it played a central role in German planning, conducting precision raids on British airfields, radar stations, ports, and industrial centres. Initially valued for its speed and manoeuvrability, the Do 17 soon proved vulnerable to RAF fighters. As the battle intensified, its limitations became evident, leading to heavy losses and reduced effectiveness.
...turn its fury on British cities...
The Luftwaffe’s strategic goal was simple: gain air superiority over southern England. If the Royal Air Force could be destroyed—either in the air or on the ground—the Wehrmacht would be free to invade.
The Luftwaffe organized its campaign in phases, intending first to eliminate the RAF’s forward airfields and infrastructure, then attack aircraft factories and command centres, and finally turn its fury on British cities to crush morale.
However, the Luftwaffe - for all its might - had yet to make good the losses of the previous campaigns (its transport arm had taken a particular battering) and would enter into the Battle of Britain somewhat short of its original strength.


Luftwaffe fighter pilots, experienced and well-trained (many of whom had flown in the Spanish Civil War as part of the German 'Condor Legion'), were pivotal to Luftwaffe plans in the Battle of Britain. Flying the formidable Messerschmitt Bf 109, they executed strategic missions to gain air superiority but faced fierce resistance from the RAF, impacting Germany's plans for invasion.
German pilots of the Messerschmitt BF.109E during the Battle of Britain – @bailey505 on Tumblr
...exposed at the most vulnerable point...

Heinkels 111's in formation. The Heinkel He 111, a German medium bomber, played a pivotal role in the Battle of Britain. Despite its versatility, it suffered heavy losses due to inadequate defensive armament.
Imperial War Museum
Furthermore, the Luftwaffe’s doctrine was not designed for long-range strategic bombing. Its bombers—mainly the Heinkel He 111, Dornier Do 17, and Junkers Ju 88—had been built for tactical support, not deep-penetration bombing.
They were heavily reliant on the Messerschmitt Bf 109 as a short-range escort, a limitation that would become increasingly costly.
Tactically, the Luftwaffe employed large, coordinated bomber formations, protected by fighter escorts.
The standard practice was to fly in close "Kette" (vic) formations, with waves of bombers covered above and behind by fast-moving 109s.
However, the Bf 109 had limited fuel capacity and could only provide around 10 minutes of cover over southern England before having to return across the Channel.
This left the bombers exposed at the most vulnerable point of their missions.


In Luftwaffe terminology, a Kette was a basic flying formation of three aircraft, typically arranged in a loose "V" shape. Used by the Luftwaffe during the Battle of Britain, this formation allowed for flexibility, mutual protection, and clear fields of fire, forming the building block of larger tactical units like the Schwarm and Staffel.
...failed to grasp the full importance...
Göring, eager for results and increasingly impatient, frequently shifted tactics, often to the detriment of his forces.
Initially focused on RAF airfields and radar stations, the Luftwaffe failed to grasp the full importance of the British radar network, and attacks on radar installations were both limited and ineffective.
When RAF resistance failed to break, Göring abruptly switched strategy in early September: London became the primary target.
This gave Fighter Command time to recover, reorganize, and continue the defence.


An excerpt from Page 1 of the report from Air Vice-Marshal Keith Park, Air Officer Commanding, No. 11 Group, to RAF Fighter Command – ‘German air attacks on England – 8 August to 10 September.’ During the Battle of Britain, Germany’s Luftwaffe used massed bomber formations escorted by fighters to target airfields, radar stations, and cities. Their aim was to destroy RAF Fighter Command and gain air superiority. Tactics evolved from strategic bombing to terror raids on civilian areas, including the sustained Blitz on London.
...diluted the effectiveness...

Moreover, internal divisions and poor coordination plagued the German effort.
The Luftwaffe was divided into three main air fleets: Luftflotte 2 under Kesselring, focused on southeast England; Luftflotte 3 under Sperrle, targeting the west; and Luftflotte 5, striking from Norway.
These fleets often operated independently, and the lack of unified command diluted the effectiveness of Germany’s overwhelming firepower.
Ultimately, they simply did not have the right organisation, leadership or aircraft for the job.
The Eagle had launched its might against Britain’s skies. But where it expected surrender, it met steel.

RAF personnel dismantle Messerschmitt Bf 109E-4, flown by Oberleutnant Egon Troha, Staffel Kapitan of 9./JG 3, and which crash-landed near Wootton Cross Roads, Shepherdswell, Kent on 29th October 1940, close to the official end of the Battle of Britain. At the start of the Battle of Britain, the German high command anticipated a swift and overwhelming victory, expecting the RAF to be crushed within weeks. Confident in their experience and superior numbers, the Luftwaffe launched relentless raids. However, British defences—coordinated through the Dowding System and reinforced by determined fighter pilots—proved far more resilient than expected. Day by day, German aircraft were shot from the skies, and losses mounted. Pilots were lost faster than they could be replaced, and the Luftwaffe's aura of invincibility began to fracture. What began as a blitzkrieg turned into a battle of attrition.
(4) Colourised RAF Fighter & Bomber Command 1939-1945 | Facebook Colourised by Colour by RJM

The Invisible Shield: The Dowding System
Long before the Luftwaffe’s engines thundered over the Channel, long before the bombs screamed down upon London and the fields of Kent, Britain was preparing.
Quietly, methodically, and with remarkable foresight, a new kind of weapon was being forged—not of steel or gunpowder, but of signals, strategy, and human resolve.
This was the Dowding System—an intricate, unprecedented web of radar, communication, and command.
It would become the spine of Britain’s air defense, and the beating heart of its survival.


The Dowding System was Britain’s revolutionary air defence network during the Battle of Britain. Named after Air Chief Marshal Hugh Dowding, it combined radar stations (Chain Home), ground observers, and centralized command and control to detect, track, and intercept enemy aircraft. Information was rapidly processed and relayed to sector stations, allowing RAF Fighter Command to deploy squadrons with speed and precision. This coordinated approach maximized limited resources and was vital in countering the numerically superior Luftwaffe.
https://www.worldhistory.org/image/18909/the-dowding--system-of-wwii/
...speed, information, and coordination...

At the centre of it all stood Air Chief Marshal Sir Hugh Dowding, commander of RAF Fighter Command.
A quiet, analytical man often misunderstood by his peers, Dowding was a visionary.
He knew that in any future war, victory in the air would hinge not on sheer numbers but on speed, information, and coordination.
Outnumbered and under constant threat, Britain could not afford to fight blindly.


The RAF Order of Battle on the 1st July 1940 (left) and a Battle of Britain fighter defence map from 1940 (right). These focus on Fighter Command's key groups which were involved in the Battle of Britain. The Dowding System was a groundbreaking air defence network that integrated radar (Chain Home), ground observers, and a centralised command and control structure. It underpinned the RAF’s 1940 order of battle and enabled efficient coordination of Fighter Command’s four groups: No. 10 (South West), No. 11 (South East), No. 12 (Midlands and East), and No. 13 (North and Scotland). The system allowed for early detection of incoming Luftwaffe raids, enabling sector stations to scramble fighters from the appropriate group. Crucially, it helped No. 11 Group, which faced the heaviest attacks, to respond rapidly, conserving resources and increasing combat effectiveness across Britain.
The Battle of Britain (arborfield-september49ers.co.uk) (Catalogue ref: AIR 41/16) Battle of Britain Map - The National Archives
...nothing less than revolutionary...
What he created was nothing less than revolutionary.
The Dowding System was the world’s first fully integrated air defense network.
At its foundation lay the Chain Home radar stations, stretched along the southern and eastern coasts.
These stations scanned the skies relentlessly, detecting incoming German aircraft while they were still miles away over France.
Radar provided the first glimpse of the enemy—but it was only the beginning.
The genius of the system was in how this data was used.
Radar operators fed information into regional Filter Rooms, where it was sifted, verified, and relayed to Fighter Command HQ at Bentley Priory.
There, Dowding’s staff—predominantly the WAAF (Women’s Auxiliary Air Force)—worked tirelessly to track incoming raids and direct fighter responses in real-time.
Plotting tables, phone lines, and radio links connected every radar station, control centre, and squadron in the country.

UK Radar coverage 1939–1940. Radar was a crucial part of the Dowding System during the Battle of Britain, providing early detection of incoming Luftwaffe attacks. This allowed the RAF to intercept and respond effectively, saving lives.

The Operations Room at RAF Bentley Priory was crucial during the Battle of Britain, as it was the nerve centre overseeing all aerial activity above Britain. Information flowed in from the Filter Room and Observer Corps Centres, allowing commanders to coordinate timely fighter responses. In March 1940, the vital nature of this work led to the relocation of the Operations and Filter Rooms into a specially constructed underground bunker to shield them from bombing. Much of the work was carried out by members of the Women’s Auxiliary Air Force (WAAF), who expertly plotted aircraft positions and relayed critical information in real time.
RAF Bentley Priory Operations Room – Bunker | Bentley Priory Museum
...nimble, responsive, and localized...

This wasn’t just technology—it was strategy incarnate.
While Göring’s Luftwaffe operated under a rigid, top-down command structure, Britain’s defence was nimble, responsive, and localized.
Fighter squadrons were grouped geographically—most notably No. 11 Group, commanded by the brilliant Air Vice-Marshal Keith Park, which bore the brunt of the fighting in the southeast.
When radar picked up an incoming raid, nearby squadrons were scrambled with precise instructions.
Fuel and resources were conserved. Pilots were sent into action only when and where they were needed most.

Map showing the sectors of No.11 Group Fighter Command. 11 Group bore the brunt of the the Luftwaffe attacks during the Battle of Britain. 11 Group played a pivotal role during the Battle of Britain, defending London and southeast England—areas most frequently targeted by the Luftwaffe. Operating under Air Vice-Marshal Keith Park, 11 Group coordinated rapid fighter responses using radar data and ground observations via the Dowding System. Its airfields, often under direct attack, launched Hurricanes and Spitfires into the fiercest fighting. The Group’s resilience and strategic control were essential in repelling the German onslaught and securing Britain’s survival.
Document 12: Radio Dirction Finding (Later termed as radar) (battleofbritain1940.net)
...astonishing regularity...
The system allowed Britain to punch above its weight.
Despite being heavily outnumbered, the RAF could intercept German bombers with astonishing regularity.
Surprise was on Britain’s side. And when the Luftwaffe shifted tactics - from bombing airfields to targeting cities - the Dowding System adapted, its network of observers and spotters filling any gaps radar couldn’t cover.


During the Battle of Britain, RAF Fighter Command was divided into six regional groups, each with a specific defensive responsibility within the Dowding System—a revolutionary command and control network. No. 11 Group, covering London and the southeast, bore the brunt of the fighting. No. 12 Group defended the Midlands and supported 11 when needed. No. 10 Group protected the southwest, while No. 13 oversaw northern England and Scotland. No. 14 and No. 9 Groups had more peripheral roles. Together, they responded to radar and Observer Corps reports, scrambled squadrons efficiently, and maintained a coordinated defence that was critical to victory.
https://www.classicwarbirds.co.uk/articles/royal-air-force-tactics-during-the-battle-of-britain.php
...orchestrating the chaos...
In the skies, Spitfires and Hurricanes clashed with Messerschmitts in fierce dogfights—but behind those victories was this silent force, orchestrating the chaos.
Dowding’s system didn’t just help win the Battle of Britain—it made it possible.
It was a masterpiece of modern warfare, a weapon built not from muscle but from intellect, innovation, and clarity of purpose.
In the end, it was not brute strength that saved Britain, but the quiet genius of a man who saw the storm coming—and built a shield of air and light to stop it.

Eyes Before the Storm: The Birth of Radar
Long before war darkened Europe, in the hushed corridors of British laboratories, a quiet revolution was underway—one that would become a cornerstone of Britain’s survival.
It began not with generals or guns, but with scientists, mathematicians, and engineers chasing an idea that seemed closer to science fiction than military doctrine: the power to detect distant aircraft using nothing but radio waves.
The man at the centre of this revelation was Sir Robert Watson-Watt, a brilliant physicist with a vision decades ahead of his time.
In the mid-1930s, as Germany rearmed and the threat of aerial bombardment loomed, Watson-Watt was approached with a question: was it possible to build a “death ray” to shoot down planes?
...the execution groundbreaking...
His answer was no—but he proposed something far more useful. What if, instead of destroying enemy aircraft from afar, Britain could see them coming?
The concept was simple, the execution groundbreaking. Radio waves would be transmitted into the sky.
If an aircraft passed through them, the waves would bounce back, revealing the intruder’s position.
In 1935, a successful demonstration near Daventry convinced the Air Ministry that the technology had real military potential. The race was on.
...now watched the skies day and night...
Over the next few years, under a veil of utmost secrecy, a network of early warning radar stations began to take shape along Britain’s coast.
These would become the Chain Home system—the first of its kind in the world.
Towering masts and receiver arrays, manned by specially trained operators, now watched the skies day and night.
To the untrained eye, they were oddities on the landscape.
In reality, they were the front line of a new kind of war.
Radar’s true power was not in isolation but as part of the larger defensive machine Dowding envisioned.
Data from these stations fed directly into Filter Rooms, where it was verified and passed along a carefully crafted chain of command.
What made this possible was the years of investment and planning that preceded the conflict.
By 1939, when war finally broke out, the system—still primitive by modern standards—was operational, battle-tested, and already saving lives during the early air skirmishes over the Channel.

Chain Home radar: This illustration shows the Dowding reporting chain for a highlighted Sector. ROC reports flow back through the Sector controls to FCHQ; it does not show the radars, which were still officially secret when this was published. Information then flows back from FCHQ to Group, between groups, and down to Sectors, and then to the defences.
UK Air Ministry
...they underestimated their significance...
The Luftwaffe, confident in their numerical and technological superiority, had no equivalent. Their air strategy assumed the element of surprise.
But surprise had been stolen from them by an invisible force they barely understood.
Even when they discovered the tall towers dotting Britain’s coastline, they underestimated their significance - and when they tried to destroy them, they found them harder to silence than expected.
Radar was no miracle handed to Britain overnight.
It was the result of patient development, tireless experimentation, and political foresight in the face of indifference.
Without it, Fighter Command would have been fighting blind. With it, they were fighting smart.
In the Battle of Britain, the storm came. But thanks to radar, Britain had already seen the lightning on the horizon - and was ready to strike back.

Knights of the Sky: The Pilots of the Battle of Britain
In the summer of 1940, as the fate of Britain hung in the balance, the skies became a crucible of fire and fury.
At the heart of the Battle of Britain were the men who soared into combat at 20,000 feet—pilots of the Royal Air Force and the German Luftwaffe, and among them, volunteers from across the globe.
Young, brave, and often barely out of school, they would decide the future of Europe with every dogfight and dive.
The RAF’s ranks were a mosaic of nations, united by a single cause: to stop the Nazi advance.
Most were British—some from working-class towns, others from aristocratic estates—but all had endured the same brutal training and knew the odds were against them.
Many had just weeks of flying experience in Hurricanes or Spitfires before they were thrown into mortal combat.

Royal Air Forces Association

Sergeant pilots from No. 92 (East India Squadron) gather around a Spitfire. During the Battle of Britain, RAF sergeant pilots played a vital role in defending Britain against the Luftwaffe. Many of these young pilots, often with limited flying experience, displayed extraordinary bravery and skill in the face of overwhelming odds. Despite not holding officer ranks, sergeants were crucial to Fighter Command’s success. Their contributions were vital in securing air superiority, and they became heroes in their own right, representing the determination and resilience of the RAF during this pivotal battle.
(4) Colourised RAF Fighter & Bomber Command 1939-1945 | Facebook
...seasoned warriors...
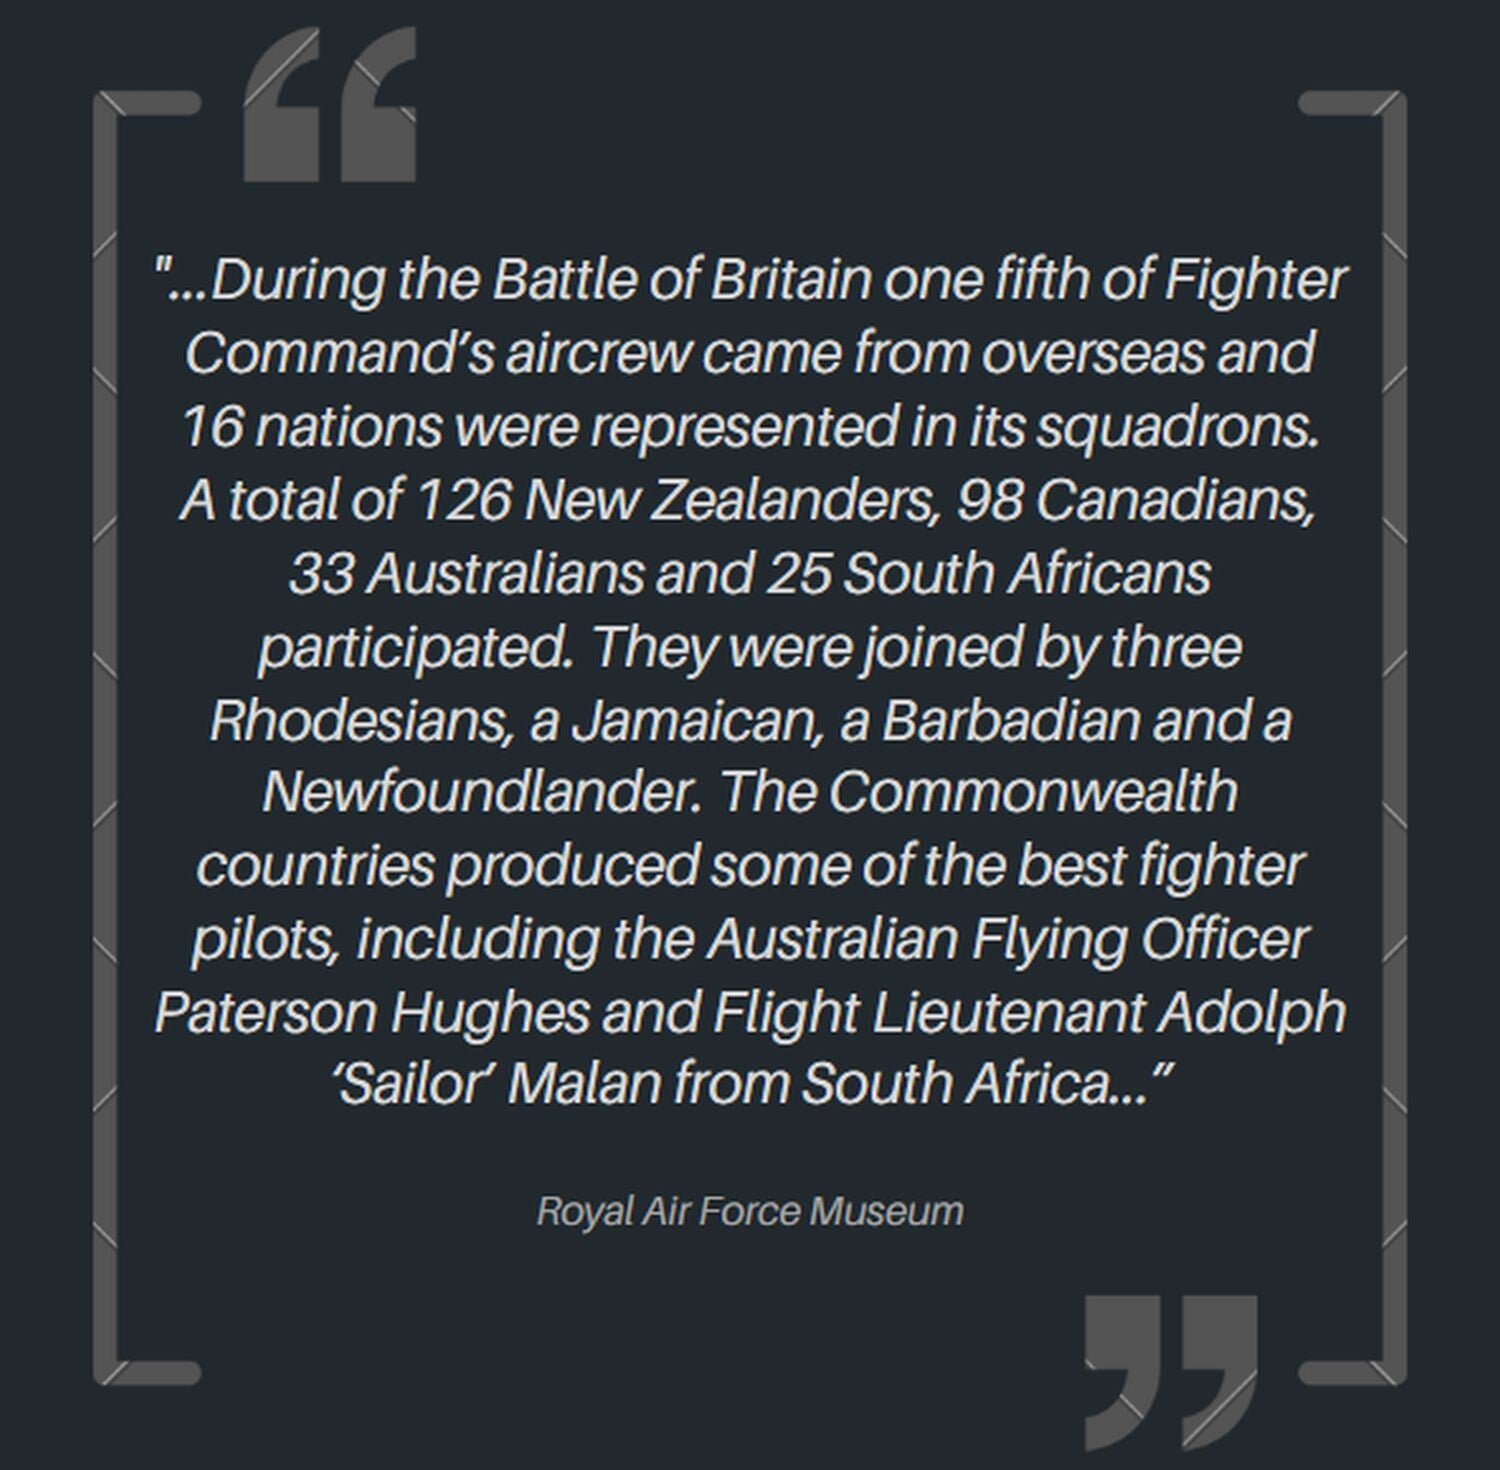
Among them were men from Canada, Australia, New Zealand, South Africa, and the wider Empire.
Others came from occupied Europe—notably Poland and Czechoslovakia.
These were seasoned warriors, many of whom had already fought the Germans and lost their homelands.
The Polish pilots, in particular, earned legendary status. Known for their fiery courage and aggressive tactics, squadrons like No. 303 (Polish) Squadron racked up extraordinary kill counts, earning the respect of even the most battle-hardened British veterans.

Pilots of No. 303 Polish Fighter Squadron RAF with Squadron Leader Johnny Kent (right). Foreign pilots, including those from Poland, Czechoslovakia, Canada, Australia, and New Zealand, played a crucial role in the RAF during the Battle of Britain. Their bravery, skill, and determination significantly bolstered Britain's defense, earning them enduring recognition and gratitude.
A hero to remember – F/O Bogdan Grzeszczak, one of Churchill’s Few (britishpoles.uk)
...invasion, subjugation, or death...
These Allied pilots flew with a mixture of desperation and defiance.
They knew that defeat would mean invasion, subjugation, or death.
Their lives were lived minute to minute—in the cockpit, every breath might be the last.
Off duty, they laughed too loudly, drank too hard, and clung to fleeting moments of joy between missions.
Some were just 18 or 19, yet carried the weight of a nation on their shoulders.


Pilots of No 310 Squadron RAF pose for a photographer at RAF Duxford on 10th July 1940. They were the first RAF Fighter Command squadron to be raised and crewed by foreign nationals. Led by S/L George DM Blackwood and using experienced Czechoslovak pilots, the unit was operational in only a month and as part of No 12 Group became involved in the Battle of Britain, claiming a total of 37½ victories.
Colourised by Petr B. Cooper from the Czech Republic.
...a matter of pride and purpose...

Luftwaffe pilot Herman Graf showing the cockpit of a Me-109 to the next generation of Luftwaffe pilots. Graf, an experienced pilot, achieved fame as a fighter ace with 212 confirmed victories during the war. He earned the Knight's Cross with Oak Leaves, Swords, and Diamonds, becoming one of Germany's most decorated pilots during the Second World War.
On the other side of the Channel, the Luftwaffe entered the Battle of Britain with confidence and momentum.
Many of its pilots were seasoned veterans, having honed their skills during brutal campaigns in Spain, Poland, and France.
They came of age in a Germany steeped in militarism and a fierce sense of national revival, shaped by the ideology of Hitler’s regime.
For these men, flying in defence of the Reich was not just duty—it was a matter of pride, purpose, and belief in ultimate victory.
Their aircraft, particularly the formidable Messerschmitt Bf 109, represented the cutting edge of fighter design—fast, agile, and heavily armed.
The Luftwaffe’s tactics, refined through years of combat, emphasized discipline, formation flying, and coordinated strikes.
Early in the campaign, German pilots believed they held every advantage and expected to dominate the skies.
As the battle began, many were convinced that Britain’s defeat was inevitable and imminent.

Dornier Do 17 crew enjoying an in flight snack. Dornier Do 17 bomber crews faced intense challenges during the Battle of Britain. Known as the "Flying Pencil" for its slim profile, the Do 17 was fast but vulnerable to RAF fighters. Crews endured heavy anti-aircraft fire, dogfights, and perilous missions, resulting in significant losses and high stress.
...a likely death in the cold sea...
But as the battle dragged on, cracks began to show.
The strain of long flights across the Channel, limited fuel reserves, and the knowledge that any engine failure meant a likely death in the cold sea took a toll.
Morale began to falter.
They were fighting over enemy territory, facing a foe who could land, rearm, and rise again.
What bound both sides was a shared experience of terror, skill, and an unshakable bond with their aircraft.


Heinkel He111 H-2 coded V4+HV of Kampfgeschwader 1 which was force landed at Haxted Farm, Lingfield, in Surrey at 11:35 am on 30 August 1940. It was attacking Farnborough and got shot up by a No. 253 Squadron Hurricane flown by P/O John Peter Greenwood. The crew of five consisted of Feldwebel Schnabel (Pilot, wounded and captured), Unteroffizier Päslack (Flight Engineer, wounded and captured), Unteroffizier (position not listed, captured) Gefreiter Groth (air gunner, captured) and Gefreiter Reis (Air Gunner, Killed in Action).
Pilots on both sides of the Battle of Britain endured harrowing losses and deep psychological scars. Each mission carried the looming threat of death, with comrades often vanishing in a flash of fire or a spiraling dive. Survivors returned shaken, many bearing the weight of trauma—haunted by what they’d seen and who they’d lost. Fatigue, fear, and grief became constant companions. Whether flying for the RAF or the Luftwaffe, none emerged from the skies unscathed.
...danced with death...

These were men who danced with death at blistering speed, whose survival depended on split-second decisions and the turn of a wingtip.
Many died in flames.
Others became legends.
In the end, it was not just machinery or tactics that decided the Battle of Britain.
It was the grit, courage, and sacrifice of the pilots—the few who risked everything so that many more might live free.

A lone Spitfire pilot during the Battle of Britain. RAF fighter pilots achieved legendary status during the Battle of Britain, earning the enduring title of “The Few.” Outnumbered and under immense pressure, they rose to the challenge with unmatched courage and skill. Flying Spitfires and Hurricanes, they intercepted wave after wave of German bombers and fighters, defending cities, airfields, and the very heart of Britain. Their efforts not only prevented a Nazi invasion but also shifted the momentum of the war. These young men, many barely out of school, became national heroes—symbols of resistance, resilience, and the unbreakable spirit of a nation under siege.
Imperial War Museum DBColour

Wings of War: Titans of the Sky in the Battle of Britain
Above the embattled skies of southern England, steel predators clashed in a ferocious ballet of speed, fire, and flame.
The Battle of Britain was not merely a test of nerves—it was a war fought on wings, where engineering brilliance and human skill collided at 20,000 feet.
Sleek Spitfires with their elliptical wings and Rolls-Royce Merlin engines danced through the sky against waves of German bombers and their deadly Bf 109 escorts.
Every dogfight was a duel of instinct and metal, of courage and combustion. The sky became a theatre of survival where fractions of seconds determined life or death.
It was a mechanical crucible that tested the limits of design, technology, and tactical innovation.
RAF pilots, guided by the revolutionary Dowding System, faced overwhelming odds, yet held their line with tenacity.
From the turbo-charged roar of the Spitfire to the relentless thunder of Heinkels and Dorniers, the fate of nations was written in contrails and cannon fire.

Vapor trails (left) from RAF planes in the skies over England recall the convolutions of British and German pilots fighting throughout the summer of 1940.

The opposing air forces, July 1940. On the eve of the Battle of Britain, the Luftwaffe, Germany’s air force, was formidable, boasting over 2,500 aircraft, including bombers, fighters, and reconnaissance planes. Their primary goal was to achieve air superiority to pave the way for Operation Sea Lion, the invasion of Britain. In contrast, the RAF had around 650 fighter aircraft, with the majority being Hurricanes and Spitfires. Despite being outnumbered, the RAF’s superior tactics, radar technology, and skilled pilots would prove decisive in the ensuing battle.
The Olde Curiosity Blog: Royal Air Force v The Luftwaffe 1940 #BattleofBritain75 #WW2
...the icon of British resistance...

The Supermarine Spitfire became an icon of the Battle of Britain, renowned for its speed, agility, and sleek design. Though fewer in number than Hurricanes, Spitfires often engaged German fighters like the Messerschmitt Bf 109, protecting bombers and airfields. Its performance and symbolism boosted RAF effectiveness and morale.
https://www.redbubble.com/i/poster/Spitfire-by-909Apparel/43274398.E40HW
At the vanguard of Britain's aerial defence stood two legends: the Supermarine Spitfire and the Hawker Hurricane.
Sleek, swift, and breathtakingly beautiful in flight, the Spitfire became the enduring icon of British resistance during the Second World War.
Designed by the brilliant R.J. Mitchell in the 1930s, it was originally conceived as a cutting-edge interceptor to defend British skies. Its distinctive elliptical wings weren't just for looks—they reduced drag and improved performance, making the aircraft remarkably agile.
Powered by the legendary Rolls-Royce Merlin engine, the Spitfire could reach speeds of over 360 mph and climb rapidly, giving it a crucial edge in dogfights.
During the Battle of Britain in 1940, it quickly earned a fearsome reputation, able to meet the Luftwaffe’s formidable Messerschmitt Bf 109 head-on in a twisting aerial duel—and often emerge victorious.
It was a fighter pilot’s dream: responsive, elegant, and lethal in the hands of the skilled men who flew it. More than a machine, the Spitfire came to symbolize hope, courage, and defiance.

A Supermarine Spitfire, pictured here on the 1st January 1940 returning from a coastal patrol. The Spitfire’s sleek silhouette, with its graceful elliptical wings and purring Merlin engine, captured the British public’s imagination like no other aircraft. It was a perfect blend of beauty and engineering brilliance—fast, agile, and deadly in combat. As it soared through embattled skies, it became more than just a fighter plane; it was a symbol of hope, resistance, and national pride. The Spitfire’s elegance and power embodied the spirit of a country refusing to surrender.
...the RAF’s true workhorse...
But it was the Hawker Hurricane that carried the bulk of the burden.
Less glamorous, slower, and constructed with a traditional fabric-over-frame design, the Hurricane was the RAF’s true workhorse.
It was easier to build, easier to repair, and terrifyingly effective against bombers.
Hurricanes accounted for more enemy kills than all other British aircraft combined during the battle, ripping into Heinkels and Dorniers with its eight .303 Browning machine guns.


Hurricane squadrons played a vital role in the Battle of Britain, forming around 60% of RAF Fighter Command’s frontline force. The Hawker Hurricane, though often overshadowed by the Spitfire in popular memory, was the true workhorse of the battle. It was rugged, stable, and easier to repair, making it ideal for engaging enemy bombers. Hurricanes accounted for the majority of German aircraft destroyed, particularly during mass raids, where their reliability and firepower proved decisive. Their contribution was crucial to defending airfields, cities, and radar stations, and securing the skies during Britain’s darkest hour.
...easy prey for the more nimble Bf 109s...

Yet the RAF's defence was not confined to these two alone. Several other aircraft, often overlooked, played critical supporting roles.
The Boulton Paul Defiant, with its unique rear-mounted turret, was initially mistaken by the Luftwaffe as a standard single-seat fighter.
This gave it early success—until German pilots adapted their tactics.
Lacking forward-firing guns and agility, Defiants became easy prey for the more nimble Bf 109s, and their operational role quickly shifted to night-fighting and target interception.

Boulton Paul Defiant Mk.Is of 264 Squadron RAF based at Kirton-in-Lindsey, Linolnshire, UK. August 1940. The Defiant played a limited role in the Battle of Britain compared to Spitfires and Hurricanes. Initially designed as a turret fighter, it proved vulnerable to agile Luftwaffe fighters. Consequently, Defiants were reassigned to night-fighting duties, while Spitfires and Hurricanes bore the brunt of daytime engagements.
...adapted to meet the evolving demands of war...
The Bristol Blenheim, originally designed as a light bomber, was quickly adapted to meet the evolving demands of war.
It was converted into a long-range fighter variant and later served as a night fighter and reconnaissance aircraft.
Though it was relatively slow and lightly armed compared to more modern designs, the Blenheim played a vital role in the early years of the conflict.
In a time when more advanced aircraft were in short supply, it helped plug crucial gaps in Britain's aerial defences and carried out essential missions under challenging conditions.


Summer of 1941. Blenheim IVs of 21 Squadron, photographed by the legendary photographer Robert Capa. Another photographer can be seen squatting in the background. V5580 is seen warming up her engines for take off. The previous year, the Bristol Blenheim had been a symbol of cutting-edge design—a fast, light bomber ahead of its time. But by the summer of 1940, during the Battle of Britain, it was already becoming outdated. Pressed into multiple roles, including night fighter and reconnaissance missions, the Blenheim filled vital gaps in Britain’s aerial defences. Though underpowered and vulnerable against modern fighters, its crews flew with courage, often facing overwhelming odds to deliver bombs or vital intelligence.
https://inchhighguy.wordpress.com/2023/01/04/bristol-blenheims-of-21-squadron-raf-color-photographs/
...a biplane relic of a bygone era...

Similarly, the Gloster Gladiator, a biplane relic of a bygone era, saw limited action with frontline squadrons and auxiliary units during the early stages of the Second World War.
Despite being outdated by the time hostilities began, it was pressed into service due to aircraft shortages.
Powered by a single Bristol Mercury radial engine, the Gladiator could reach speeds of around 250 mph and was armed with four .303 machine guns.
Though no match for modern monoplane fighters, it played a brave role in defending airfields, naval bases, and other key installations in Britain and overseas.

A Gloster Gladiator from No. 521 (met) Squadron RAF takes off over a Triumph Gloria and a pilot at RAF Bircham Newton. Though a biplane relic in the age of sleek monoplanes, the Gloster Gladiator still saw action during the early stages of the Battle of Britain. Outclassed in speed and firepower, it nonetheless played a role in defending airfields and key installations, especially with auxiliary and training units. Piloted by determined airmen, the Gladiator stood as a symbol of bravery and necessity—holding the line until more advanced fighters like the Hurricane and Spitfire could take the lead.
...battle-tested from Poland to France...
Across the Channel, the Luftwaffe unleashed a storm of iron and fire.
The nimble Messerschmitt Bf 109 was a sleek predator—fast, heavily armed, and battle-tested from Poland to France.
With a top speed comparable to the Spitfire and armed with 20mm cannons, it was a formidable foe.
Thanks to its powerful Daimler-Benz DB 601 engine, streamlined design, and sturdy airframe, the Bf 109 could dive very rapidly—often faster than its main adversaries like the Spitfire and Hurricane.
Luftwaffe pilots frequently used this to their advantage, especially in "boom-and-zoom" tactics: diving into an attack at high speed, firing, then using momentum to climb back out of danger before the enemy could react.
However, its Achilles’ heel was range. With limited fuel capacity, German fighters had mere minutes over British skies before they had to turn back or risk ditching into the Channel.
...its silhouette a symbol of German air power...

The Messerschmitt Bf 110 – nicknamed "Zerstörer," which means "Destroyer" in English - roared through the skies of Britain with a presence that was impossible to ignore—twin engines growling, guns bristling, its silhouette a symbol of German air power.
Built for range, speed, and firepower, it was the Luftwaffe’s bold answer to the need for a heavy fighter.
In formation, it looked unstoppable, escorting bombers through a storm of flak and fighters.
Bf 110 crews flew with determination and skill, pushing the aircraft to its limits in the fierce, swirling battles high above the English countryside, although ultimately, they would find themselves being outmanoeuvred by the Spitfires and Hurricanes time and time again.

The menacing sight of German Me 110 aircraft patrolling the English Channel. The 110, a twin-engine heavy fighter, played a significant role in the Battle of Britain. Although heavily armed and fast in a straight line, it proved ill-suited to the intense dogfighting of the Battle of Britain. Lacking the agility of single-engine fighters like the Spitfire and Hurricane, it struggled to defend itself without constant support. Intended as a long-range escort and bomber destroyer, it was often outmaneuvered and picked off by RAF pilots. The Bf 110’s shortcomings became clear, and its role was quickly reduced after heavy losses.
Andy Saunders/BNPS
...screaming dive bombers sending waves of panic...
The Junkers Ju 87, or Stuka, had earned its terrifying reputation in the early years of the Second World War, its screaming dive bombers sending waves of panic through Europe.
In the Battle of Britain’s opening days, the Stuka proved devastating, accurately striking strategic targets and causing chaos.
Its precision and fearsome dive attacks were initially successful in softening British defenses.
However, as the battle raged on, the myth of invincibility quickly unraveled.

RAF Spitfires and Hurricanes, swift and lethal, targeted the Stukas' slow speed and poor maneuverability. What was once a symbol of fear became a sitting duck, its losses mounting rapidly.

A formation of Junkers Ju-87 'Stuka' dive bombers in formation. The Junkers Ju-87 'Stuka' dive-bomber, notorious for its fearsome siren, played a significant role during the early phase of the Battle of Britain, known as the Kanalkampf. Targeting British shipping and coastal defenses, the Stuka aimed to disrupt supply lines but proved vulnerable to RAF fighters, leading to heavy losses.
Royston Leonard / mediadrumworld
https://www.mirror.co.uk/news/uk-news/gallery/back-blitz-colourised-photographs-show-11240765
...carried a deadly payload and could absorb significant damage...

The Heinkel He 111, with its distinctive glazed nose and twin engines, was the Luftwaffe’s workhorse bomber during the Battle of Britain.
Sleek and deceptively modern in appearance, it carried a deadly payload and could absorb significant damage.
Flying in tight formations, it rained bombs over cities, airfields, and radar stations in a relentless effort to break Britain’s resistance.
But in daylight raids, it became a target. Slow and lightly defended, it was vulnerable to Spitfire and Hurricane attacks.
RAF pilots tore into bomber streams, and Heinkels often limped home—or didn’t return at all. Brave crews flew on, but losses mounted.
...designed to strike hard and fast...
The Dornier Do 17, known as the "Flying Pencil" for its sleek, narrow fuselage, entered the Battle of Britain with deadly intent.
Fast and agile for a bomber, it was designed to strike hard and fast, delivering payloads of bombs with precision.
However, its speed and design weren’t enough to withstand the ferocity of RAF fighters. As the battle escalated, the Do 17 became increasingly vulnerable.
Swarmed by Spitfires and Hurricanes, many were torn apart mid-flight.

What was once considered a formidable weapon became a high-risk target, its losses mounting as the skies over Britain turned into a deadly arena.

A German Dornier Do 17 after crashing into a house during the Battle of Britain. The Dornier Do 17, nicknamed the “Flying Pencil” for its slim fuselage, played a prominent role in the early stages of the Battle of Britain. Fast and agile for a bomber, it was capable of delivering precise strikes on airfields and radar stations. However, as RAF resistance stiffened, its vulnerabilities became clear. Light defensive armament and limited armor left it exposed to Spitfires and Hurricanes. Increasing losses ultimately reduced its impact, marking the decline of its frontline role.
...versatile and lethal...

The Junkers Ju 88, versatile and lethal, soared into the skies during the Battle of Britain, a key weapon in the Luftwaffe's arsenal.
Capable of being configured as a bomber, dive bomber, or fighter, it was a fast, agile aircraft that struck with terrifying precision.
Initially, it posed a serious threat to British defenses, bombing airfields and radar stations. But as the battle intensified, its weaknesses became apparent.
Despite its speed and firepower, the Ju 88 struggled to withstand the relentless attacks from RAF Spitfires and Hurricanes, suffering heavy losses over time.

Luftwaffe pilots of a Junkers 88A-1 bomber (9K AL), belonging to 3. Staffel Kampfgeschwader 51 "Edelweiss", prepare for flight during the Battle of Britain, Paris-Orly, Autumn, 1940. The Junkers Ju 88 was one of the most versatile and formidable bombers deployed by the Luftwaffe during the Battle of Britain. Fast, agile, and able to carry a significant bomb load, it was used for level bombing, dive-bombing, and even night operations. Early missions saw it deliver punishing blows to British airfields and radar sites. However, sustained RAF resistance exposed its vulnerabilities, and Ju 88s increasingly fell victim to determined attacks by Hurricanes and Spitfires.
The Kampfgeschwader 51 was heavily involved in the Battle of Britain. The first (a Ju 88) loss recorded on 1st July 1940, near Dunbar, Scotland. On 7th September 1940 it had 34 Ju 88s combat-ready. Attacks over Britain between 1st July and 31st October cost it 12 aircraft destroyed with 19 damaged. The KG 51 saw further action during the Balkans Campaign, Eastern Front, and on the Western Front.
Photo source: Bundesarchiv (101I-402-0265-03A)
https://www.facebook.com/people/Colorizing-historical-photos/100063511450772/
...aimed to overwhelm British defenses through sheer numbers...
German tactics during the Battle of Britain revolved around tightly coordinated, bomber-led formations, with escorting fighters providing close cover.
This strategy aimed to overwhelm British defenses through sheer numbers and coordination.
However, the RAF, equipped with the Dowding System—an advanced network of radar, observer posts, and centralized control—was often one step ahead.
As the Luftwaffe approached, the RAF could position its fighters in the perfect spot.
Spitfires engaged in fierce dogfights with the nimble Bf 109s, while Hurricanes, more suited to attacking bombers, tore through the tight formations, disrupting the Luftwaffe’s momentum and inflicting significant losses.

The main RAF and Luftwaffe aircraft which took part in the Battle of Britain.
...a diverse fleet working in harmony...
Ultimately, the Battle of Britain was not won by any single aircraft, but by the combined efforts of a diverse fleet working in harmony.
The RAF’s mixture of Spitfires, Hurricanes, and even older or experimental fighters held the line against the relentless Luftwaffe.
It was a triumph of adaptability, coordination, and sheer determination.
Outgunned and outnumbered, Britain’s defenders rose into the sky time and again, not just fighting with their aircraft, but with the unwavering spirit that would define their victory.


Report on German Air Attacks on England, 8th August 1940 – 10th September 1940.

German planes published at the request of the War Office to enable people identify the enemy.
https://doverhistorian.com/2013/08/08/battle-of-britain-1940/
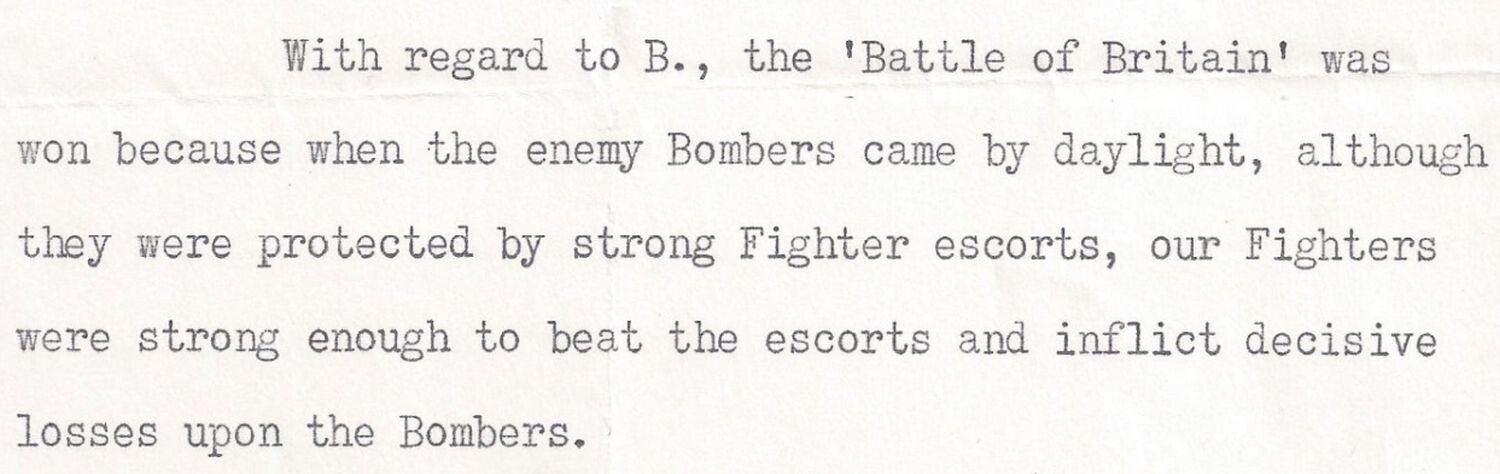
An extract from a letter written by WInston Churchill during the Blitz to a Major D. Percy Davies at the News of the World newspaper.


Further Reading


Matthew Parker’s The Battle of Britain: June–October 1940 offers a vivid and compelling account of the RAF’s fight for survival during one of WWII’s most critical campaigns. Drawing on firsthand testimonies, official records, and gripping narrative, Parker explores the strategy, human drama, and national stakes involved. He captures not only the aerial dogfights but also the broader social and political context, painting a powerful portrait of resilience and courage in Britain’s darkest hour.

James Holland offers a comprehensive and human-centered account of the Battle of Britain, blending strategic analysis with personal stories from pilots, ground crew, and civilians. He challenges popular myths, highlighting the importance of logistics, innovation, and leadership in Britain’s survival. Holland paints a vivid picture of the broader war context, emphasizing the combined effort of all branches of service and society. His narrative captures both the tactical complexity and emotional gravity of 1940.

David E. Fisher presents a gripping narrative of the Battle of Britain through the lens of Air Chief Marshal Hugh Dowding’s leadership. The book explores Dowding’s pivotal role in shaping Britain’s air defense, including the development of radar and the creation of Fighter Command. Fisher delves into the scientific and strategic aspects of the battle while offering insight into Dowding’s often underappreciated contributions. The story reflects the blend of brilliance, tension, and heroism of 1940.

Patrick Bishop delivers a compelling and fast-paced account of the RAF’s desperate struggle to defend Britain in 1940. He focuses heavily on the pilots—"The Few"—bringing their bravery, fears, and camaraderie to life through firsthand experiences. Bishop places the human story at the center of the battle, emphasizing the youthful courage and sacrifice that defined the RAF’s efforts. The book combines thrilling storytelling with a reverent tone, capturing the emotional intensity of Britain’s finest hour.

Richard Overy offers a scholarly and balanced analysis of the Battle of Britain, situating it within the larger framework of the Second World War. He debunks romanticized versions of the battle, presenting it as a complex military and political struggle. Overy examines strategic decisions on both sides, the role of technology, and the psychological impact of the conflict. His work is informative and critical, providing readers with a nuanced understanding of why the battle truly mattered.

Malcolm Brown's Spitfire Summer: The Story of the Battle of Britain offers an in-depth look at Britain's solitary stand against Nazi Germany in the pivotal summer of 1940. Drawing from the Imperial War Museum's archives, the book presents firsthand accounts of the men and women who contributed to the Battle of Britain, both in the air and on the home front. It highlights the resilience and determination that thwarted Hitler's invasion plans, showcasing the collective spirit that defined this critical period.

Finest Hour by Phil Craig and Tim Clayton is a gripping, human-focused account of the Battle of Britain, blending personal stories with historical analysis. Based on interviews, diaries, and letters, it brings to life the experiences of pilots, civilians, and commanders during Britain’s fight against the Luftwaffe. The book captures the fear, bravery, and determination of a nation under siege, offering an intimate and emotionally resonant portrait of one of WWII’s most defining moments.

Stephen Bungay’s The Most Dangerous Enemy offers a masterful, well-researched account of the Battle of Britain, blending sharp analysis with vivid storytelling. The book challenges myths, clarifies strategy, and examines the political and technological factors that shaped the conflict. Bungay draws on British and German sources to portray the battle from both sides, while highlighting the bravery and skill of RAF pilots. Insightful and accessible, it’s a definitive, balanced history of Britain’s finest hour.